Leipzig-Lite
Peter Berry
Part 1 - The Madness begins...
For the last few years, the Baccus team has tried to put on something a little extra at the World Championships event held at Derby University. We've done painting demos and simple participation games all based on the premise of introducing wargamers to the concept of gaming with 6mm figures. The venue is particularly suited to this sort of thing, being airy and very well provided with natural light. One of the stalwarts in this process is my friend and long-term helper in all things Baccus, Derek Pitman.
In 2007 he took a very simple participation game with him. The premise was straightforward enough. A two foot square board gridded into 16 squares. One French and one British Napoleonic army, a bit of very simple terrain and an excellent set of rules called 'Old Trousers', which can be downloaded if you >>>Click Here>>> This deceptively simple set of rules and the short duration of the game (15-20 minutes) proved irresistible to attendees and Derek was kept busy all weekend with people, young and old wanting to have a go. In fact this unassuming little game took the best participation game award, which was an unexpected bonus for all of us.
However, there was Dark Side to all of this. The success of the game served to give Derek...Ideas.
Towards the end of the show he walked up to me with a crazed expression in his eyes. 'Do you know,' he whispered in the hoarse, cracking voice of a man teetering over the void of insanity, 'if we were to make the board four times bigger, and do some more armies, and add some terrain features...'. As I looked into his glazed and red-rimmed eyes I could see that it was too late for my old friend. '...we can do LEIPZIG and get the game played in half an hour!' And having thus unburdened himself he returned once more to his game and started cackling all the while doing arcane calculations and unimaginable scrawls on odd bits of paper.
'Leipzig,' I thought to myself, 'the biggest battle of the Napoleonic wars, with over half a million combatants from all over mainland Europe. Leipzig, the Battle of Nations.' My mind began to engage the possibility, the scope of it all, the ambition, the sheer ridiculous impossibility. Derek's madness had truely transferred itself and I was helpless before it. 'Leipzig on a four foot square table fought to a conclusion in 30 minutes! It can be done! It MUST be done!'
The Great Insanity had started...
Part 2- The Reality sets in.
Luckily for me, release was at hand, as I realised that it had only been the fatigue of a two day show setting in and that it had all been a bad dream. Then Derek sent me a map and the memories came flooding back. We were soon discussing the requirements for the game with Derek agreeing to paint the armies and myself and Chris (my son) doing the terrain.
Armed with Derek's map

We then set about the process of building the battlefield of Leipzig.
As you can see from the map the whole thing is greatly abstracted. The aim is not to reproduce an exact model of the area, but more of a practical representation of the main features roads, rivers, bridges, villages and of course, Leipzig itself. In fact the final result will be even more simple than the map would show, as several small villages were deemed to be unnecessary. Mark and Barrie at Timecast were contacted and they kindly agreed to provide the buildings.
With all this sorted out, the time had come to start the building process.
Part 3 - Building a Battlefield - how difficult can that be?
Now we come to the nitty gritty of this piece. How we built the board. The first thing to say is that as I type this, we haven't actually finished it yet. We've no idea whether it's all going to work or not. Which brings us on to the second point. We've not actually done a lot of this kind of thing, so if it sounds as if we know what we are doing, remember that we are actually making it all up as we go along.
We decided to go with a solid MDF base to the game. I've used polystyrene in the past and found it to be a real pain to work with. It's also very fragile and suffers badly in the inevitable transport and set up. So what we ended up with was two 4 foot by 2 foot sheets of mdf screwed on to a timber frame to give solidity and stability to the end result.
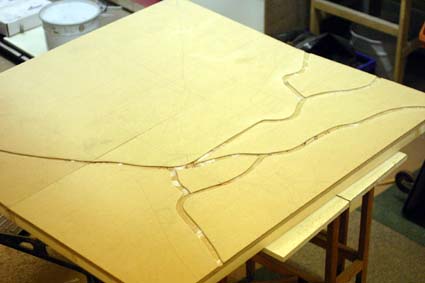
One of the major features of the battlefield is the river system. We chose to model this by covering the board with a veneer of 3mm mdf out of which the river course would be cut leaving us with nice clear channels. As a theory it sounded good, but we'd no idea if it would work. The first task was to transfer the basics of the map on to the board. This left us with this:
The next step saw me let loose with a jigsaw, slicing through the 3mm mdf panels to make the segments that theoretically fitted together. This proved to be quite a tricky job as keeping the width of the rivers constant proved to be challenging to one of my limited experience with power tools. Once this was done there then came the laborious task of assembling them all in place and securing them with pva glue and panel pins.

We were now ready to move on to the next stage.
Part 4 - The Tricky Bit.
As I said in the opening section, Derek's rules work on a gridded board. We decided to use the technique that we'd applied to the smaller game that we'd made in the previous year. This works as follows:
1) Mask off the grid lines using masking tape.
2) Cover the board with PVA glue and then sprinkle sand over the area. Let the sand dry and shake off any excess.
3) Once the glue is dry, remove the tape. This leaves the grid outline as smooth mdf surface. Paint the whole thing dark brown and then use successively lighter shades to highlight it all.
4) Cover irregular areas with pva glue and sprinkle with nylon flock. These areas should ignore the grid lines, and cover about 3/4 of the surface area.
The end result should therefore be practical in that the grid is evident when you are playing the game, but the large areas of green tend to break up the lines and hide it when viewed from a distance. This worked nicely with the small board.
The above is the theory, The practice proved - different.
For a start we added roads which were made by squeezing filler out of a nozzle in the same way that people ice cakes. Once the filler had set these were sanded down so that they just stood proud of the surface. However, these and the rivers were a real pain when we laid the masking tape down as we had to cut the tape to enable them be clear of the grid marking.
The second problem was self-inflicted. I forgot to buy masking tape so we used ordinary clear sellotape instead. This proved incredibly tenacious when it came to removal and provided Chris and myself with a couple of hours of intensely unnecessary work.
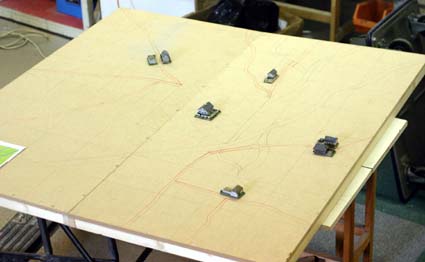
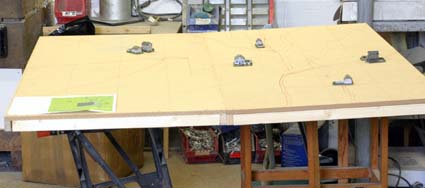
Anyway, here's a couple of pictures of Chris hard at work with brush in hand just tidying things up.
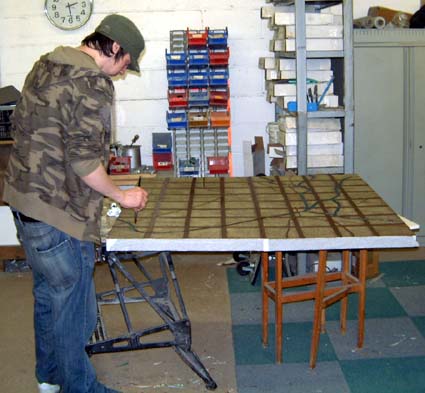
And one of the board after the highlighting has been done. The rivers have had an initial coat of dark green paint, the roads are now dark grey and the village areas have been added in black.
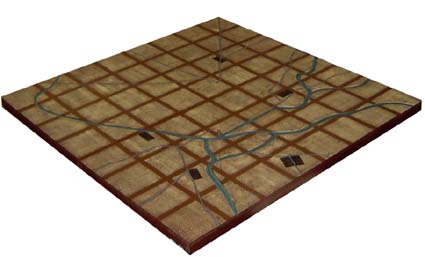
As you can see the whole thing is beginning to take shape, but there's still a lot more to be done.
>>>Click Here>>> to see how it all turns out...